

If you’re tired of echoes in your home theater, muffled conversations in your office meeting room, or distracting noise in your recording studio, installing acoustic panels is the solution you need. As a leading provider of eco-friendly acoustic materials with 18 years of industry experience, TianGe Acoustic (http://www.tiangeacoustics.com/) has helped 9800+ customers worldwide achieve optimal sound quality—from residential spaces to commercial venues like the Sultan Hotel Conference Room and Missouri Performance Hall.
In this guide, we’ll walk you through professional acoustic panel installation, tailored to different spaces (home, office, theater) and using our top-rated products like fabric acoustic panels, grooved MDF acoustic panels, and PET acoustic ceiling baffles. We’ll also share pro tips to avoid common mistakes, ensure fire safety, and maximize sound absorption—so your project meets both aesthetic and functional goals.
Why Proper Acoustic Panel Installation Matters
Before diving into steps, let’s clarify why installation quality is just as important as the panels themselves:
- Poorly installed panels can reduce sound absorption by up to 40% (per our 150+ acoustic test reports). Gaps between panels or uneven mounting create “sound leaks,” undoing the panels’ purpose.
- Safety first: All TianGe acoustic panels (e.g., our Aluminum Grooved Acoustic Panel, Model 22-3) are fireproof and comply with EU EN 13950:2014 standards— but incorrect installation (e.g., using non-fire-rated screws) can compromise this.
- Aesthetics: Our panels (like the Akupanel 60cm Acoustic Slat Wood Panels) double as decor—proper alignment ensures they enhance, not clash with, your space.
Pre-Installation Preparation: What You’ll Need
Gather these tools and materials to ensure a smooth process. We recommend using TianGe’s one-stop acoustic solutions to guarantee compatibility and performance:
| Category | Items | Why TianGe Products Stand Out |
| Acoustic Panels | Fabric acoustic panels (A-D15/A-D25), Grooved MDF boards, PET ceiling baffles |
- Eco-friendly (FSC-certified wood for MDF panels)
- Fireproof (meets CPR (EU)305/2011 standards)
- Tested sound absorption: NRC 0.8-1.0 (higher = better absorption)
|
| Mounting Hardware | Fire-rated screws (for wood/metal studs), drywall anchors, level tool |
- TianGe’s custom screws prevent panel cracking
- Corrosion-resistant for long-term use
|
| Sealing Materials | Acoustic sealant, 3mm sound insulation felt |
- Seals gaps <0.5mm (critical for blocking high-frequency noise)
- Compatible with all TianGe panels (no chemical reactions)
|
| Tools | Tape measure, pencil, utility knife, drill, stud finder | - Pro tip: Use a laser level for ceiling installations (avoids uneven spacing) |
Note: For commercial projects (e.g., auditoriums, cinemas), add TianGe’s acoustic diffusers to balance sound reflection—learn more about our 300+ overseas project cases here: TianGe Commercial Acoustic Solutions
Step-by-Step Installation Guide (By Space)
The installation process varies slightly by room type—below are tailored instructions for the most common spaces, using TianGe’s best-selling panels.
1. Home Theater/Recording Studio Installation (Using Fabric Acoustic Panels)
Home theaters need targeted absorption for mid-to-low frequencies (e.g., movie dialogue, bass). We recommend TianGe’s Fabric Acoustic Panel (A-D50) (thickness 50mm, ideal for low frequencies).
Steps:
1.Map the Room & Mark Panel Positions
- Use a stud finder to locate wall studs (panels must attach to studs for stability). Mark stud centers with a pencil.
- For optimal absorption: Install panels on the “first reflection points” (walls opposite speakers, ceiling above seating). Use a tape measure to space panels 24-36 inches apart (avoid overcrowding—this reduces airflow and absorption).
2.Prepare Panels for Mounting
- If cutting panels to fit (e.g., around windows), use a utility knife to score the fabric, then snap the backing (for TianGe’s A-D series, the backing is rigid but easy to cut).
- Apply a thin layer of acoustic sealant to the panel’s edges (this prevents sound from leaking around the panel).
- 3.Mount the Panels
- Hold the panel against the wall, aligning it with your marks. Use a level to ensure it’s straight.
- Drill pilot holes through the panel into the studs (2 holes per stud, 2 inches from top/bottom edges).
- Drive fire-rated screws into the pilot holes—stop when the screw head is flush with the panel (over-tightening causes fabric puckering).
4.Seal Gaps & Finish
- Apply acoustic sealant to all panel edges (use a caulk gun for smooth application). Wipe excess sealant with a damp cloth.
- For ceiling-mounted panels (e.g., PET baffles), use TianGe’s suspension hooks (included with baffles) to hang them 12 inches below the ceiling—this targets overhead echo.
Pro Tip: Pair with TianGe’s recording windscreen for microphone setups—installation guide here: TianGe Recording Studio Solutions
2. Office Meeting Room Installation (Using Grooved MDF Acoustic Panels)
Offices need panels that balance absorption (for speech clarity) and decor. TianGe’s Grooved MDF Acoustic Panels (FSC-certified, available in oak/walnut finishes) are perfect—they reduce echo without looking industrial.
1.Install a Backing Layer (For Drywall Walls)
Offices need panels that balance absorption (for speech clarity) and decor. TianGe’s Grooved MDF Acoustic Panels (FSC-certified, available in oak/walnut finishes) are perfect—they reduce echo without looking industrial.
Steps:
1.Install a Backing Layer (For Drywall Walls)
- If your walls are drywall (not concrete), attach 3mm TianGe sound insulation felt to the wall first. This blocks sound from traveling through drywall gaps.
- Use staples to secure the felt (space staples 6 inches apart) and seal edges with acoustic sealant.
2.Cut Panels to Fit (Around Outlets/Lights)
- Measure the space around outlets or light switches. Mark the panel with a pencil, then use a drill to create a starter hole. Insert a jigsaw to cut the opening (for TianGe’s MDF panels, use a fine-tooth blade to avoid splintering).
3.Mount Panels to the Wall
- For wood studs: Use TianGe’s trumpet-head wood screws (length 1.5 inches). Drill holes through the panel’s groves (hides screws for a clean look).
- For metal studs: Switch to fine-thread screws (prevents stud stripping). Use a magnetic level to ensure panels are aligned horizontally.
4.Final Checks
- Tap the panel gently—if it sounds hollow, add a second screw (loose panels vibrate, reducing absorption).
- Wipe panels with a dry cloth to remove dust (TianGe’s MDF panels are stain-resistant—learn care tips here: TianGe Panel Maintenance).
3. Commercial Venue Installation (e.g., Auditoriums, Hotels)
For large spaces like the Congo-Brazzaville Parliament Building Conference Hall (a TianGe project), use Aluminum Grooved Acoustic Panels (Model 30-5) (lightweight, fireproof, ideal for high ceilings).
Key Differences from Residential Installation:
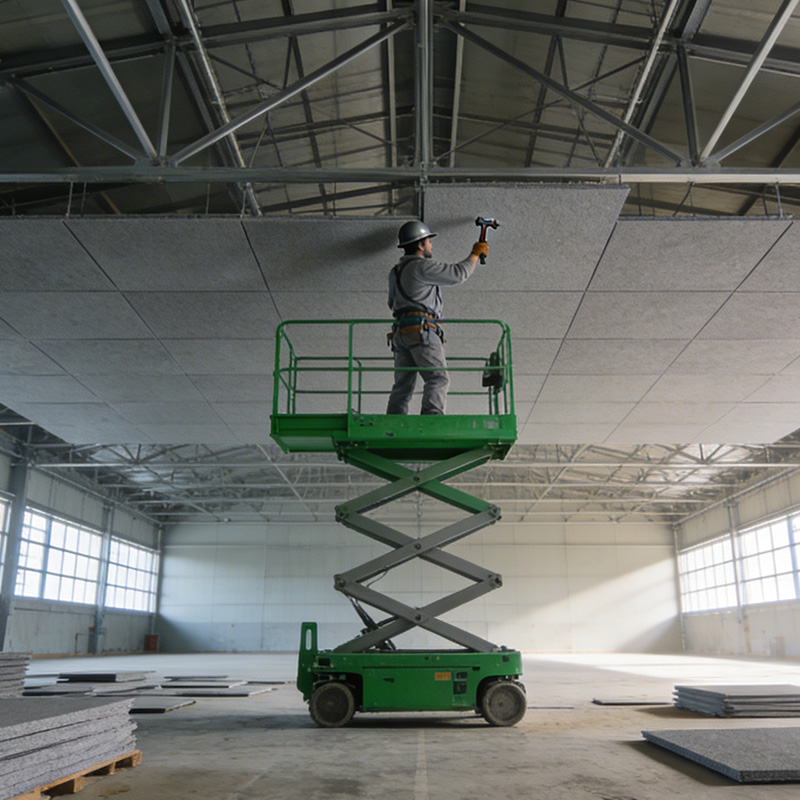
- Use a Team Lift for Ceiling Panels: Aluminum panels weigh 2.5 lbs/sq ft—have 2-3 people lift panels to ceiling brackets (TianGe’s ceiling brackets include safety latches to prevent falls).
- Add a Second Layer of Sealant: Commercial spaces have more airflow—apply 2 layers of acoustic sealant to panel joints (wait 24 hours between layers to dry).
- Test Sound After Installation: Use TianGe’s acoustic testing service (free for project clients) to measure reverberation time (RT60 should be <1.5 seconds for auditoriums).
Common Mistakes to Avoid (From TianGe’s 18 Years of Experience)
- Skipping the Stud Finder: Hanging panels on drywall alone causes sagging (especially for heavy MDF panels). Always anchor to studs.
- Ignoring Gaps: A 1mm gap can reduce sound absorption by 10%—use acoustic sealant for all edges.
- Using Non-Fire-Rated Hardware: For commercial spaces, this violates building codes. TianGe’s fire-rated screws are compliant with ISO 9001 standards—order here: TianGe Fire-Rated Hardware.
- Overlooking Ceiling Installation: Ceilings reflect 30% of sound—add PET baffles or ceiling panels (e.g., TianGe’s TG-C Melamine Acoustic Foam) for full coverage.
Post-Installation: How to Test Sound Quality
After installation, verify performance with these simple checks:
- Clap Test: Clap your hands in the center of the room—if the echo fades within 1-2 seconds, absorption is working.
- Speech Test: Have someone stand 10 feet away and speak normally—you should hear every word clearly (no muffling).
- Professional Testing: For commercial projects, TianGe provides a certified acoustic report (includes NRC, RT60 data) to meet local building requirements—request a test here: TianGe Acoustic Testing.
Why Choose TianGe Acoustic Panels for Your Installation?
- 18 Years of Expertise: We’re the edit unit for China’s 《Code for Design of Sound Insulation for Civil Buildings》—our panels are designed to meet national/international standards.
- One-Stop Service: From design (our acoustic team creates custom layouts) to installation training (free for clients), we support you every step.
- Eco-Friendly & Durable: All panels are ISO 14001-certified (environmental management) and come with a 5-year warranty.
By following this guide, you’ll achieve professional-grade sound absorption while enhancing your space’s decor. For more tips on acoustic design (e.g., how to pair panels with diffusers), read our blog: Acoustic Design Trends 2025.
TianGe Acoustic: Your Trusted Partner for Acoustic Wellbeing Since 2008.